Sharing data and building white label client portals
Octoboard helps you access and visualize your cloud data, generate reports and share insights with internal teams and clients.
Data sharing is very easy with Octoboard. Once data is collected and presented in dashboards or reports, you can use a number of ways to distribute information and provide public access.
This article covers the following options for data sharing: Public Dashboards for online displays, Dashboard TV Loops for office TV screens, Dashboard Embedding for building custom client portals, White Label Subdomain Hosting for providing white label login access to online dashboards, Scheduled report generation for distributing PDF reports by email to clients and internal teams.
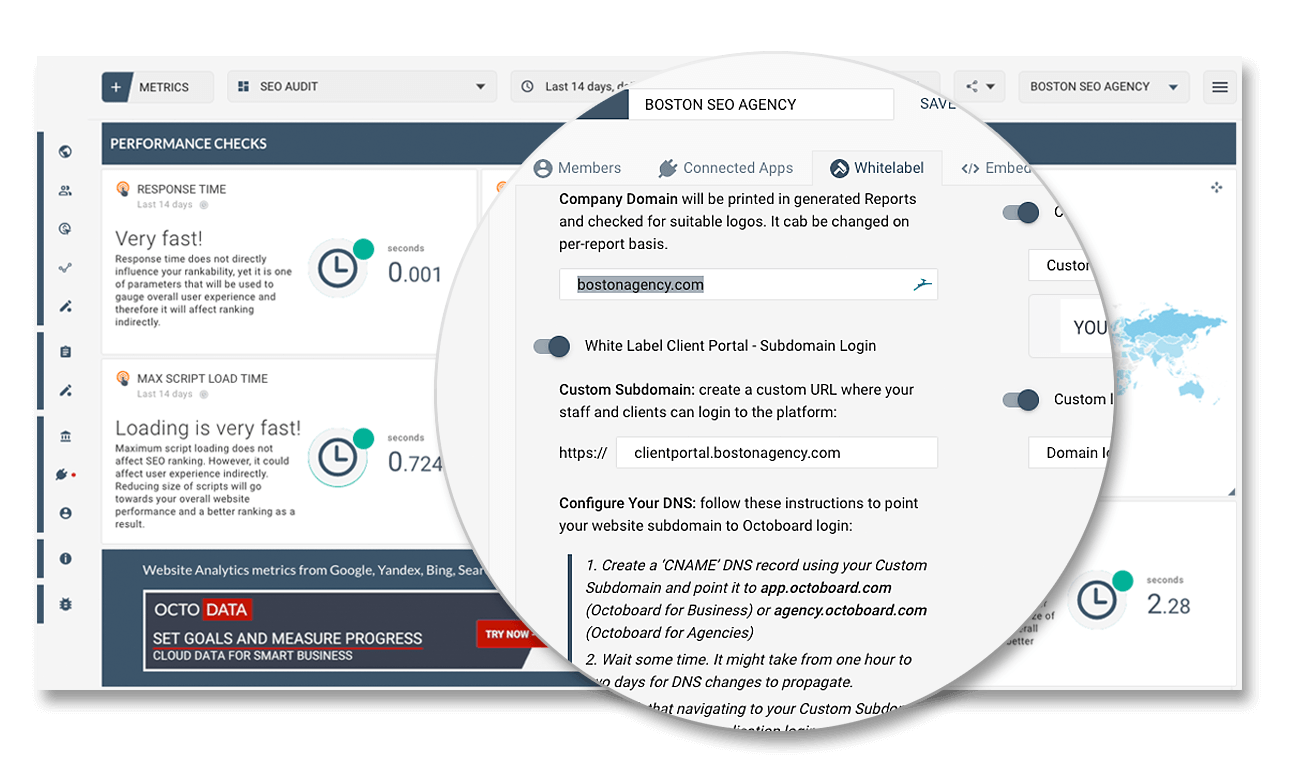
You can create dashboards and reports and use them to build client portals on your own website. With Octoboard you can create login page on a subdomain of your website, for example: client-portal.yourwebsite.com. All references to Octoboard will be removed. Clients will experience seamless transition from your site to Octoboard-powered subdomains with white label logins.
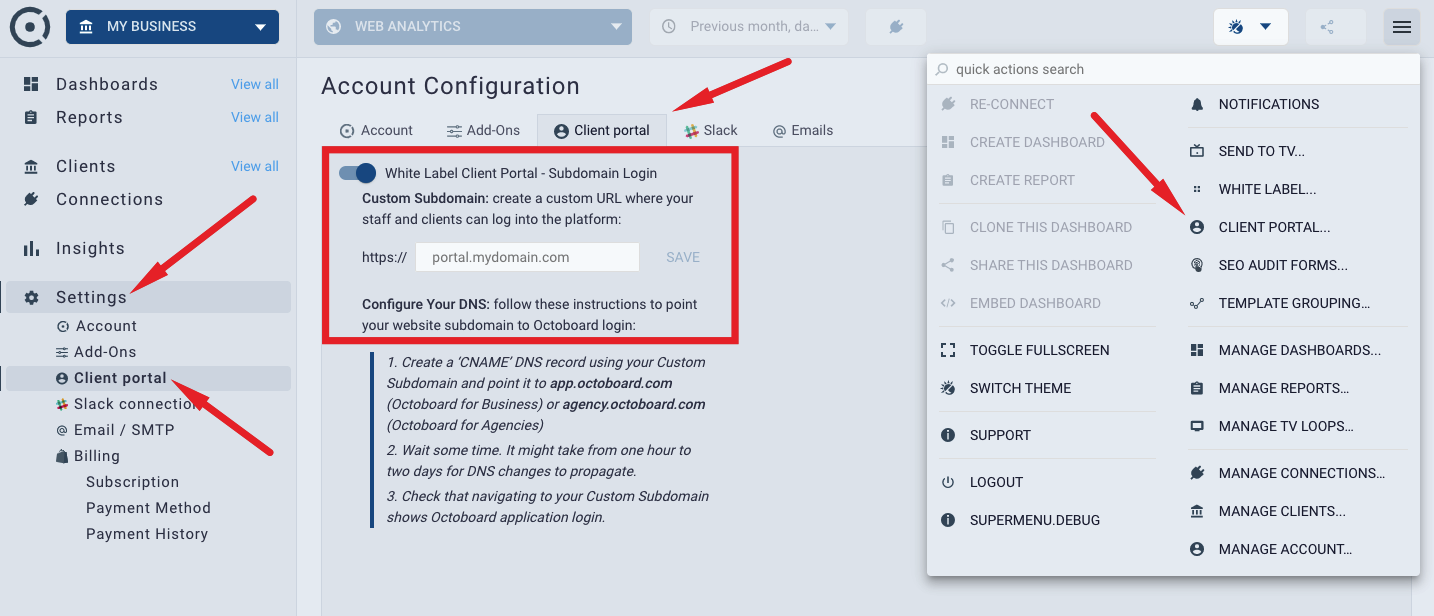
White label subdomains is a free add-on feature available in all premium Octoboard accounts. Subdomain is configured in the ACCOUNT settings. To configure this feature, please go LEFT MENU > SETTINGS > ACCOUNT > CLIENT PORTAL. Follow these 3 steps to enable it:
STEP 1: Create a ‘CNAME’ DNS record using your Custom Domain and point it to ‘app.octoboard.com’ or 'agency.octoboard.com'
There is a number of Youtube tutorials that show how to configure CNAME. Check that your CNAME configuration is working by visiting this link: https://dnschecker.org/#CNAME
When defining your subdomain, make sure you exclude "www." from it. For example, "https://www.reports.mywebsite.com" is wrong, correct value in this case is "https://reports.mywebsite.com".
STEP 2. Wait for the DNS changes to propagate and use dnschecker.org to verify it.
Make sure that dnschecker.org shows that your subdomain is pointing to either app.octoboard.com or agency.octoboard.com before proceeding to STEP 3. Octoboard has no control over CNAME configuration of your domain. Until you see the DNS Checker map in green, there is nothing Octoboard can do since there is no website traffic reaching our servers. As part of the portal set up our platform issues SSL certificate for your domain. It happens automatically and takes a few hours. Octoboard will only issue a certificate if your CNAME is configured correctly. So please make sure dnschecker.org is working before trying to log into your new portal.
STEP 3. Wait and check that your new subdomain shows Octoboard application login.
If after 24 hours you still have an error message above, please contact Octoboard Support and we will verify your configuration. Please include your account email address and subdomain details. We will run automated checks for you and will respond by email.
If you want to send a link to your portal in a different language, use "lang" parameter at the end of the url when sharing the link. For example, https://client-portal.yourwebsite.com?lang=es will show your portal in Spanish. Available languages are: English (en), Spanish (es), Portuguese (pt), Italian (it), German (de), Dutch (nl) and French (fr).
ADMIN of a client can invite more users to view or manage dashboards and reports for that client. To invite a new user, go to "Top Right Menu > Manage Clients > Members Tab".

Specify user email address and click "SEND INVITATION" button.
The new user will receive an email inviting him to the Octoboard client. The new user will be prompted for new password. When the user accesses Octoboard he will only see dashboards and reports of the client(s) or user group(s) that he was invited to.
You can always set appropriate role for the new user - ADMIN, EXPERT or VIEWER - in order to control what the new user can do in Octoboard. Roles can be changed at any stage later by the administrator of the client or user group.
For more details about managing users, visit Multiple clients, users, app logins tutorial
You can create dashboards in Octoboard by using any of our 300+ ready-made, fully customizable data templates or by creating new custom dashboards from scratch. Any created dashboard is private by default. Private dashboards are only visible withing the Octoboard application. However, you can make any private dashboard public by using the "PUBLIC" switch at the top of the screen.
The switch is found in the header of the main screen.
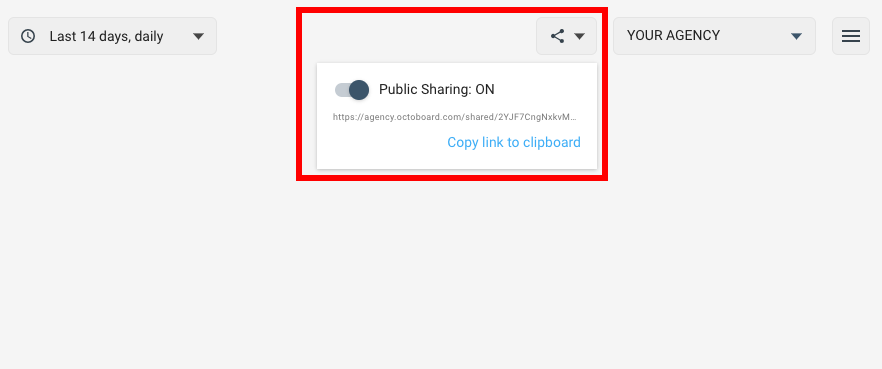
When you toggle the switch, current dashboard becomes public. A unique URL is generated and copied to clipboard.
You can send generated public URL link to your clients or team members. Anyone with the link will be able to see that dashboard without logging into Octoboard. Public dashboard data will keep updating automatically. Any data changes will be reflected simultaneously for all viewers with the link.
You can make the dashboard private again. When public dashboard is made private, all previously generated public links will stop working and a notification message will be shown to all users who try to access them.
Public dashboard will be automatically updated. For information on how often data is refreshed and updated, please read our Knowledge Base post on Data update frequency in Octoboard.
TV Loops are designed for office screen displays and are used to show several relevant dashboards to internal teams of an organization. For example, a group of "Sales Dashboards" created using QuickBooks data can be grouped into a TV Loop for a TV display hanging on the Sales Department’s office wall.
Dashboard TV Loops are a great way to show sequences of dashboards one after another on the same screen. A TV Loop looks very similar to a slideshow. Octoboard will use smooth transitions between each "slide" with dashboards fading in and out. You can group dashboards and set delays in seconds for ever slideshow / loop screen change.
For more information on how to set up and configure office TVs and wall monitors for Octoboard dashboards and data loops please read our Knowledge Base post on how to connect office devices to Octoboard platform.
Go to TOP RIGHT menu > MANAGE TV LOOPS...
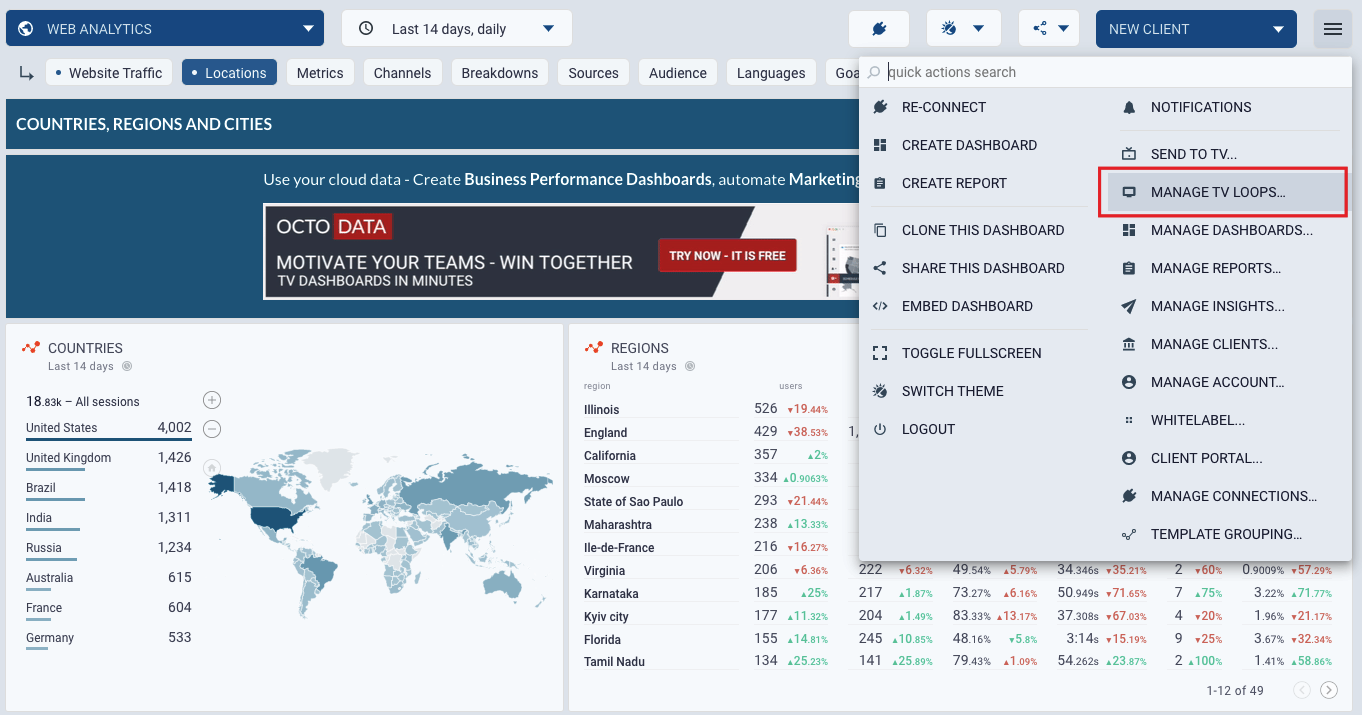
TV Management panel will be displayed. These are the main configuration options:
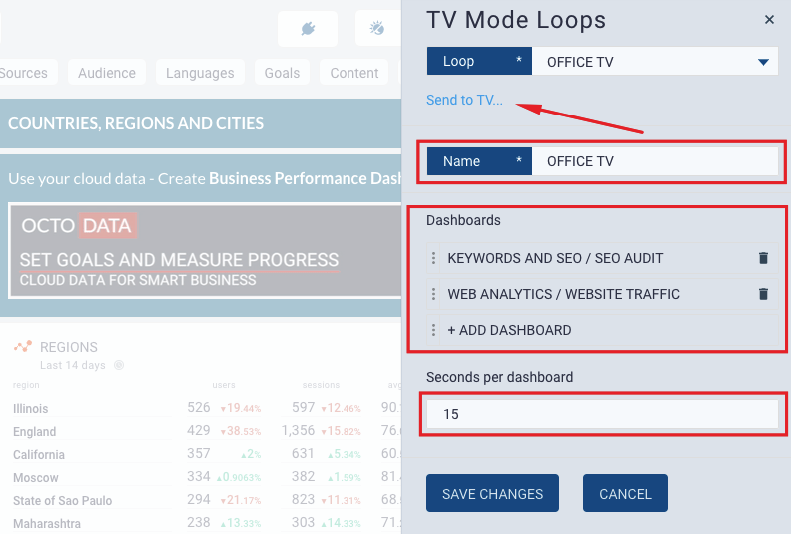
Loop name - new loop name
Dashboards - list of dashboards that make up TV Loop. Add dashboards and define display sequence.
Seconds per dashboards - set delay in seconds for each dashboard display
Once you have defined a TV Loop, you can send it to an external device (TV or wall monitor) by using "Send to TV" link. You can manage devices and assign data loops or individual dashboards to display directly in Octoboard without the need to manipulate office device settings. All you need is a device capable of running a compatible web browser. For more information on browser requirements please visit our tutorial on How to set up and manage office devices (TVs or wall monitors).
You can put client dashboards and reports on any page of your website by using dashboard embedding feature.
To setup embedding you should use an iFrame code generated by Octoboard and put it on any page of your website where you want to display client dashboards or reports. You can protect access to embedded dashboards easily by using a PIN security feature from Octoboard or implement your own login.
Embedded dashboards are fully white labeled - all references to Octoboard already removed. To your visitors and clients they will look like a neat feature of your website – a great looking data analytics technology. Octoboard will do all the heavy lifting on the background. All you need is generate iFrame code and put it on your website pages.
iFrame code is generated per Octoboard client. Go to LEFT MENU > CLIENTS > SELECT CLIENT > EMBEDDING TAB.
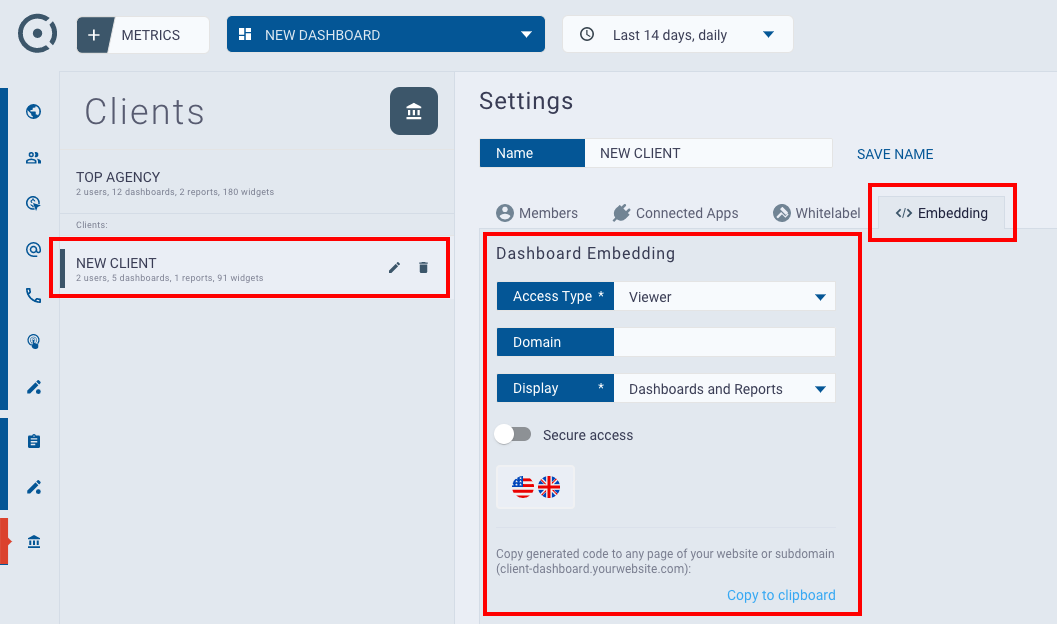
In embedding tab use the following configuration:
Access Type - specify the level of access you want to give to your clients. Viewer allows read-only access to dashboards, while Editor can modify dashboard configuration – change, remove, reposition widgets in dashboards.
Domain is an optional configuration. By specifying your domain, you will add security. It will guarantee that the generated iFrame code will only work when embedded in your website.
Display switch allows you to configure if you want to show reports, dashboards or both.
Secure access switch allows you to specify a 6-digit PIN code. Users can only see dashboards if they know and enter the PIN.
Language switch will set the language of the displayed dashboards and reports. This will affect timeframe labels. If you would like to change widget titles, you can always do so by modifying widget parameters (use widgets' Top-Left menu > Quick Switch option).
Once you have completed above actions you can copy the generated iFrame code to clipboard and paste it to your website html code.
iFrame code should be inserted anywhere in the
part of the html page.USEFUL TIP: before embedding the code to your website test is using this public page https://tinyurl.com/try-embed. Paste generated iFrame code there, click "RUN" button and check the results. Before testing, make sure you clear "Domain" field above.
Your clients will see the very last dashboard or report in the list. You can always define which element will be displayed by default. Use drag-and-drop feature of reports and dashboards list to move default element to the bottom of the list.
Absolutely. You embed dashboards by creating a generic iFrame and inserting it to your web pages. Wordpress is no different. You can use any of the available Wordpress iFrame plugins for embedding Octoboard iFrames.
Octoboard can monitor changes in your cloud data trends automatically and send regular updates to your Slack channel or by email. You can ask for data insights from all major cloud platforms - from Paid Advertising systems to Web Analytic and Social Networks.
We have prepared some 50 insights for you to choose from. Setting up your Slack channel or email for receiving updates is very easy. This tutorial shows the main steps for selecting insights and setting up distribution channels.
For more details please read how to set up automated data insights in Octoboard platform.
If you purchase Octoboard PPC Data Analytics add-on, you will be able to collect data from paid advertising platforms (Google, Facebook, LinkedIn, TikTok, Criteo, AdRoll) as well as from Google Analytics, and send it to external systems. You can also configure access to the Octoboard's own Data Warehouse.
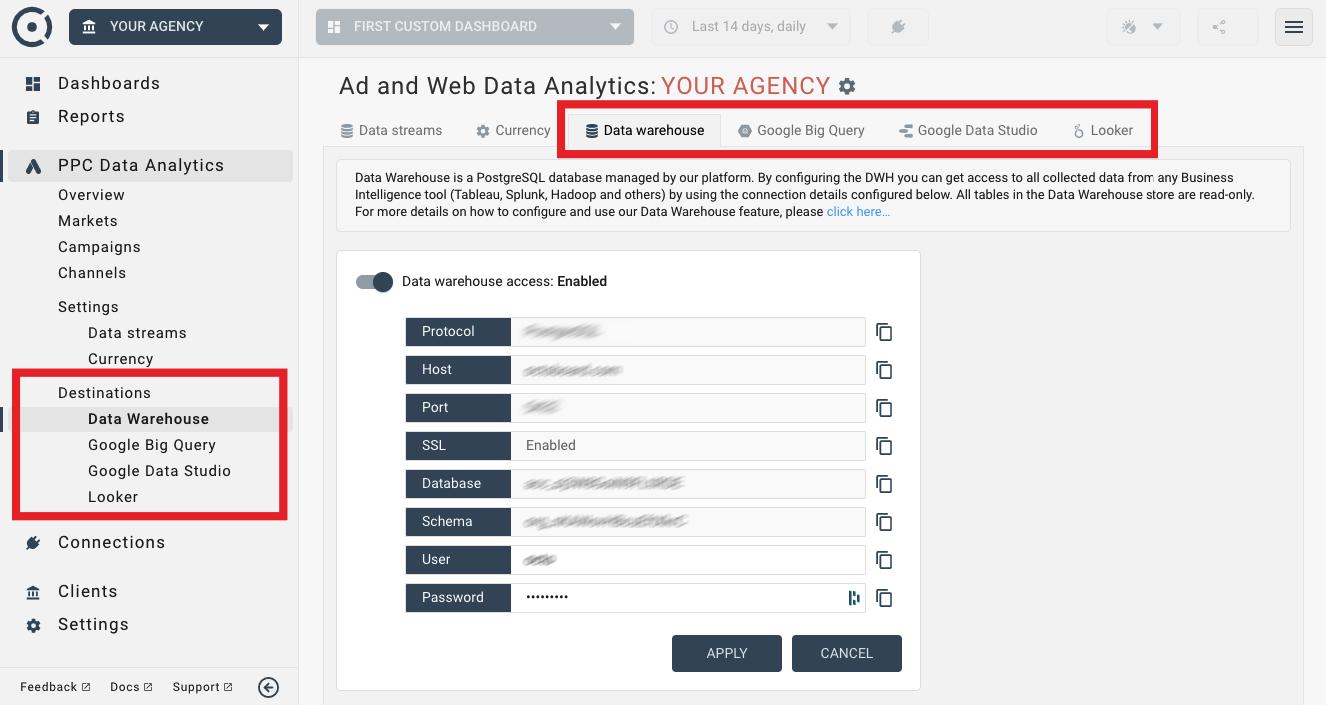
The following links will offer details tutorials on use the data export features of the Octoboard PPC Analytics Add-on:
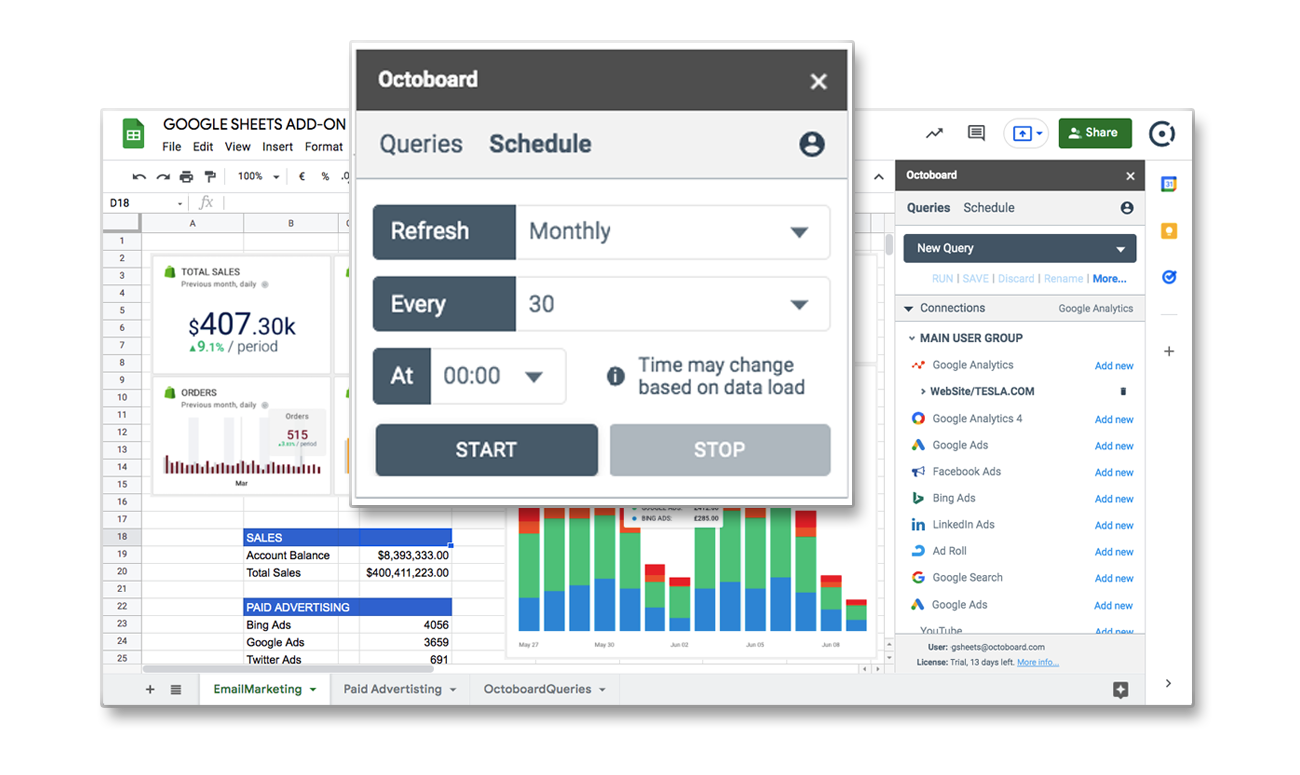
Optional Google Sheets add-on will allow you to send collected data to Google Sheets documents. The following tutorial covers Octoboard Google Sheets add-on in more details.