How to send Zapier events to Octoboard
Zapier allows you to exchange data between hundreds of cloud applications in real time. When you connect your Zapier account to Octoboard, you can send live events from any of the 2000+ Zapier apps.
You can send text and numeric values to real-time widgets in your online dashboards, client portals and directly to Octoboard reports. Zapier integration is available in all Octoboard products and subscription plans.
Businesses use Zapier integration to send real-time company updates and push client communication messages to white label client portals and Octoboard office TV screens and to display real-time company performance figures such as Daily Sales, New Purchases, Live Subscriptions, Monthly Revenue and much more.

In this tutorial, we will create Text Zapier widget in Octoboard to receive real-time Company Updates directly from a Slack channel. The same can be used to push Client Communication (messages) to automated reports, client portals and online dashboards.
Octoboard supports the following actions:
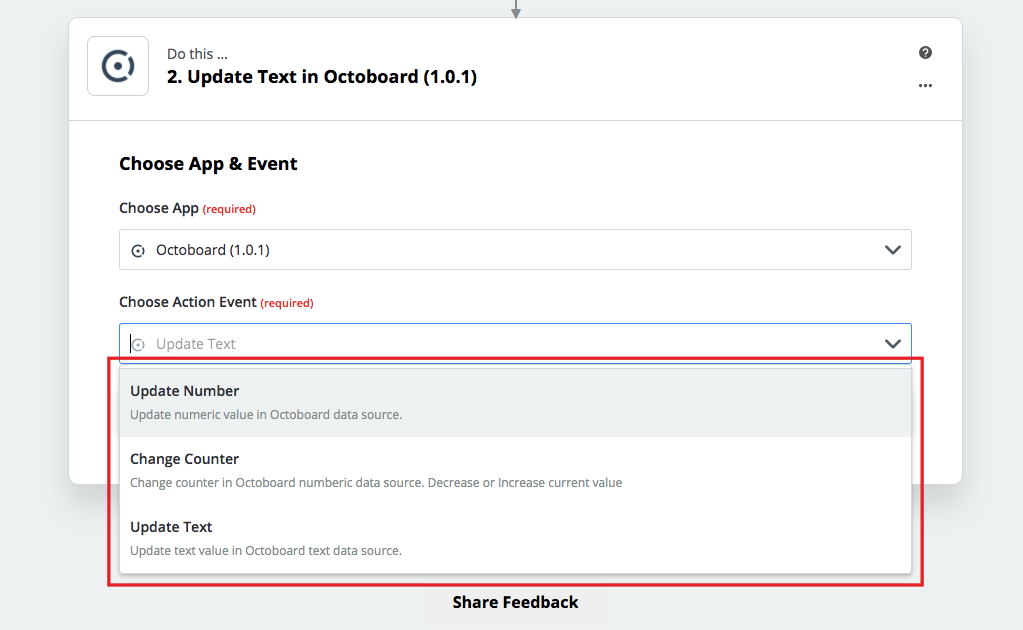
- Update Number Action updates values in real-time widgets with Zapier event data
- Change Counter Action increments or decrements numeric widget by a set value
- Update Text Action updates or adds a new text value to a widget
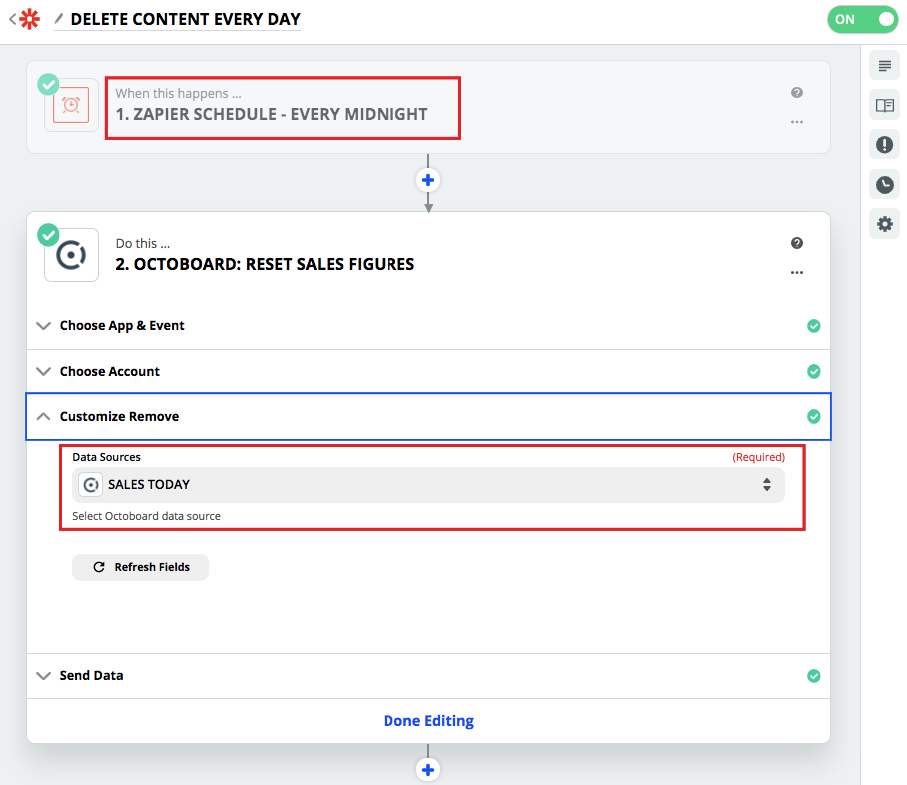
- Delete Content deletes all data from a selected Octoboard data source
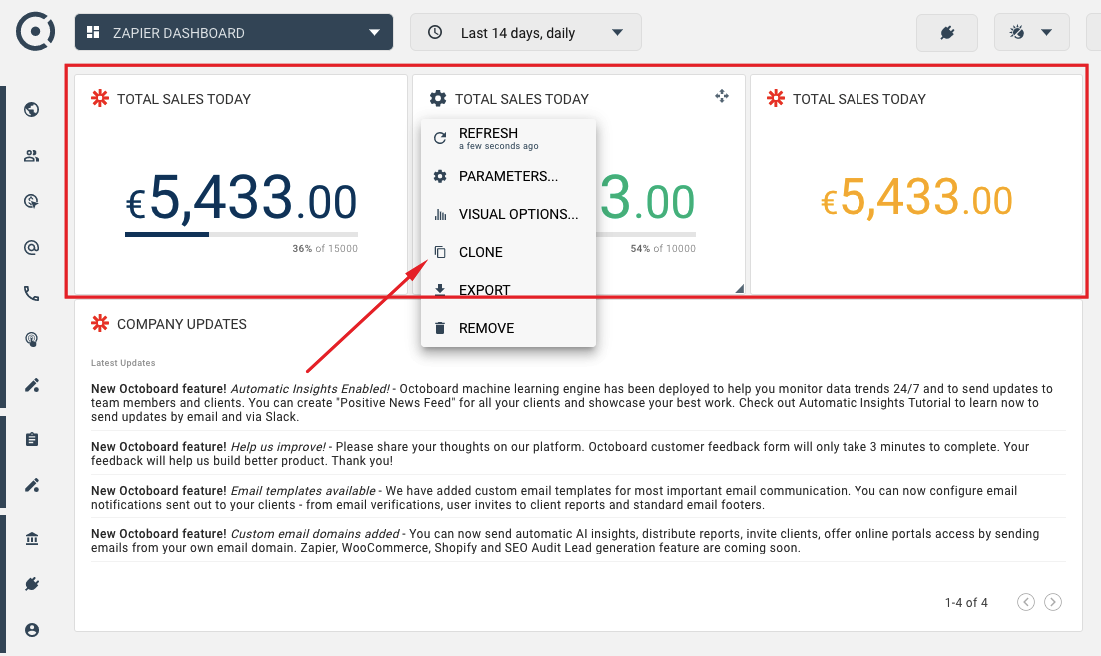
We use Zapier data sources to receive events in Octoboard. Once a data source is created and Zapier is sending events to that data source, you can then point Zapier widgets to display data from the data source. You can have many widgets displaying data from the same Zapier data source in Octoboard. Here is an example of 3 Zapier widgets displaying values from the same Zapier data source (daily sales figures reset every midnight):
Data sources can be of two types – Number and Text. For this tutorial we will create COMPANY UPDATES (Text) data source.
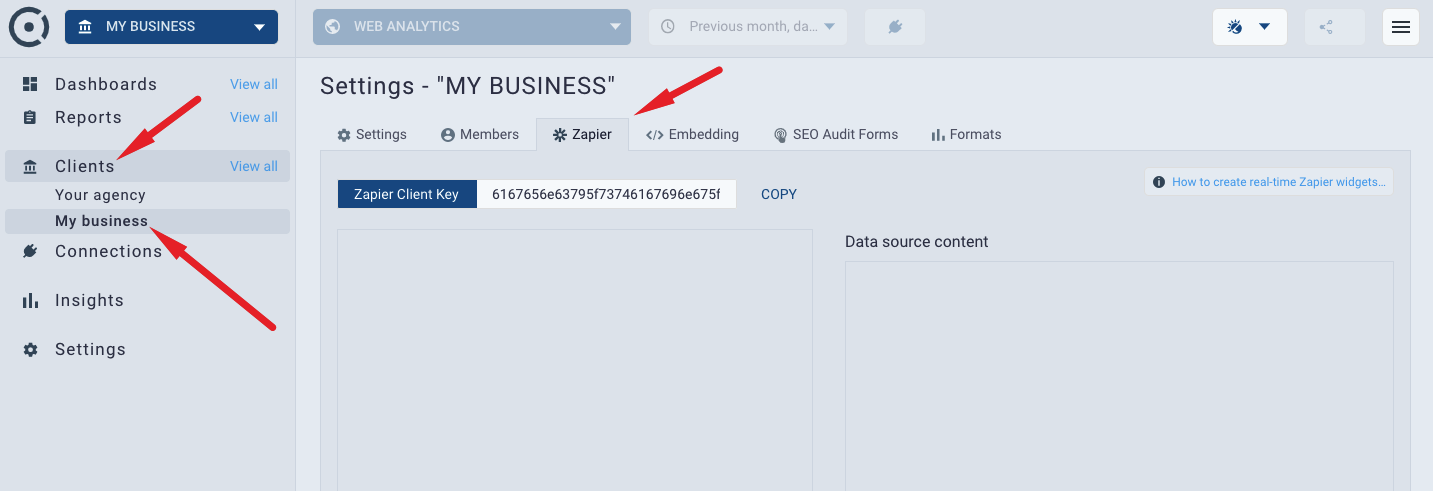
To access Zapier and data sources configuration, go to LEFT MENU > CLIENTS, select client (or team) that you want to configure Zapier for and click "Zapier" tab as shown on the following image:
You will be connecting cloud applications in Zapier by selecting destination Octoboard clients and data sources.
To create Zapier data source (numeric or text), go to your Zapier configuration panel (LEFT MENU > CLIENT > Zapier Tab). Here you can create, delete and inspect contents of your Zapier data sources.
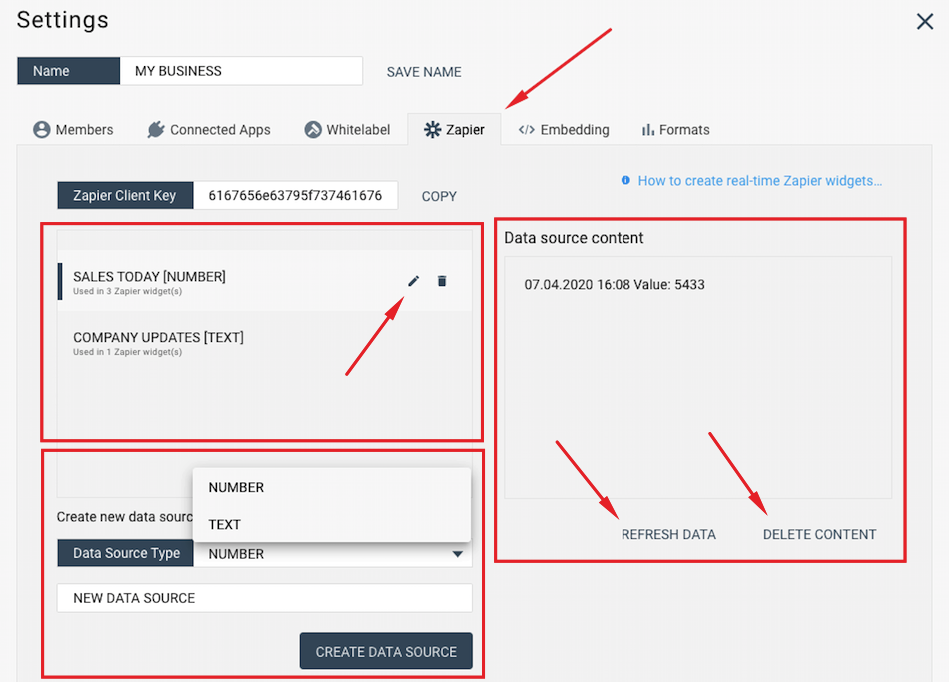
Use "CREATE DATA SOURCE" button to add new data source. Make sure you set "Data Source Type" switch to correct value (NUMBER or TEXT). Numeric data sources can only receive Zapier events with numeric data. Text data sources can only receive Zapier text updates.
For this tutorial please create 2 data new sources – SALES TODAY (Numeric) and COMPANY UPDATES (Text) as shown on the image above.
Once you have created data sources, you can setup new Zaps in Zapier and add widgets to Octoboard reports and dashboards to display live events.
Take a note of the Zapier Client Key. Copy the Key to the clipboard. Zapier will ask you to enter Client Key when connecting to Octoboard.
* Creating new Zapier ZAP – Send Slack Messages to Octoboard
Log into your Zapier account and select a source application that will be generating events. In this case we select Slack. We will send Slack channel messages to Octoboard text data source. Follow usual steps to connect to Zapier to Slack and use Slack as your Zap source application:
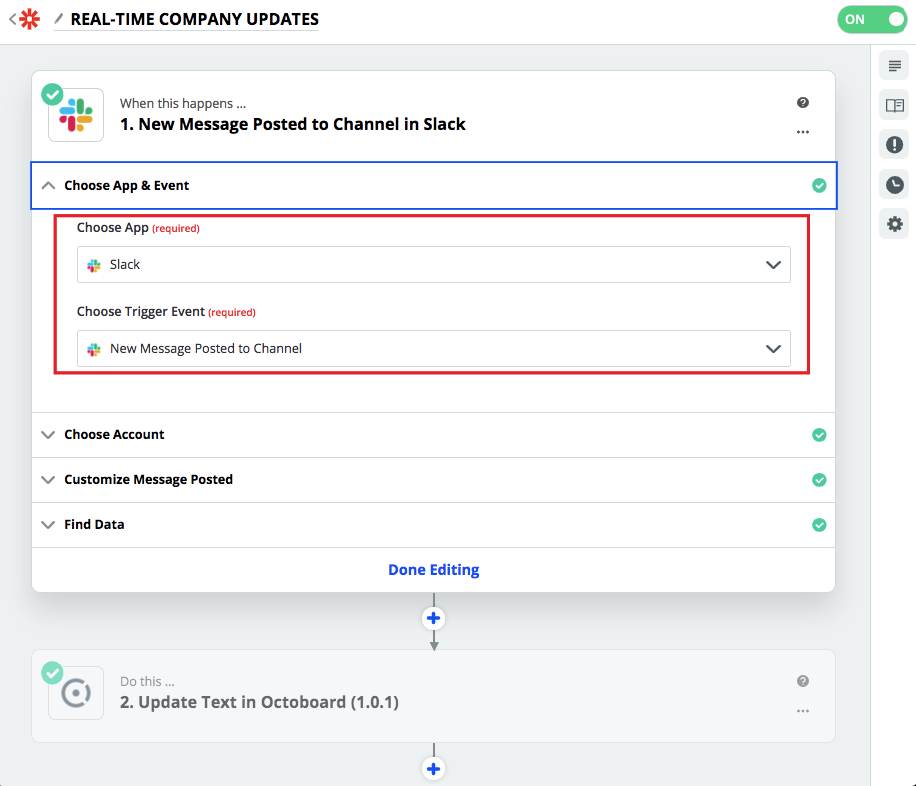
Second step in creating the Zap is to connect to a destination application (Octoboard). Select Octoboard from the list of Zapier apps and enter Client Key (copy client key from your Zapier configuration screen located in Octoboard LEFT PANEL > CLIENTS > Zapier Tab > Client Key). Remember, Client Keys are unique to Octoboard Client (or Team). Your Octoboard account will have several Zapier Client Keys all located in "Zapier" tab. Make sure you enter correct key for selected Octoboard Client (or Team).

Once connected to Octoboard, select "Update Text" action as shown on the image below:
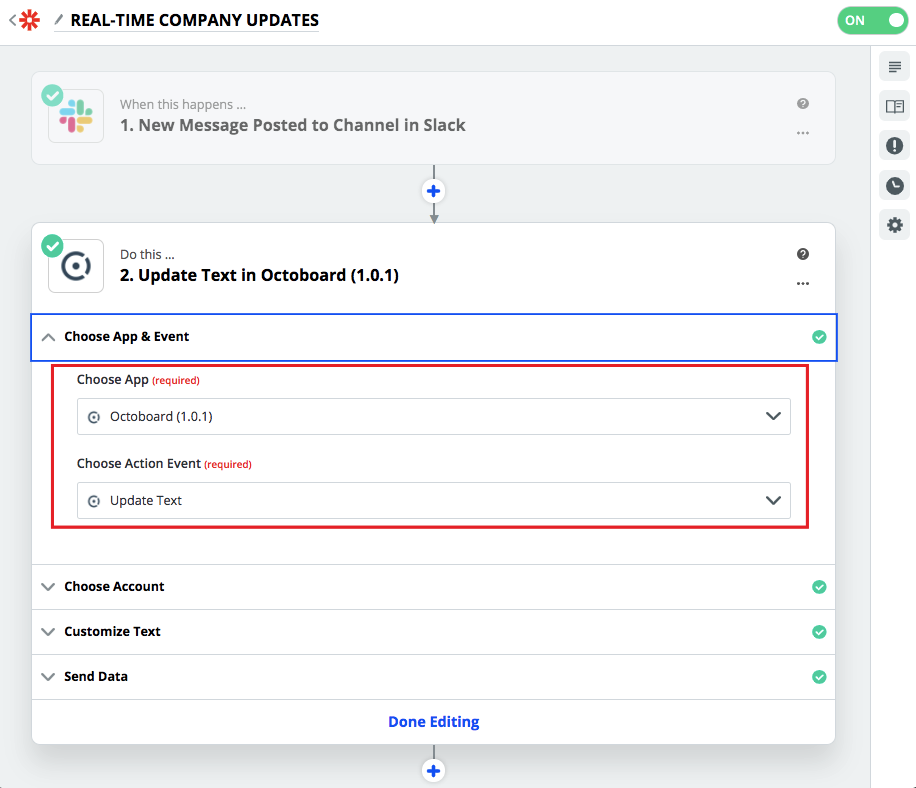
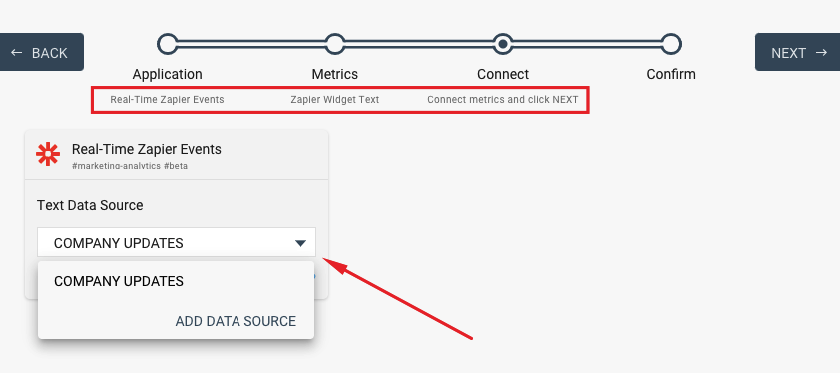
You will be asked to select Text Data Source. Select "COMPANY UPDATES" data source that you created earlier.
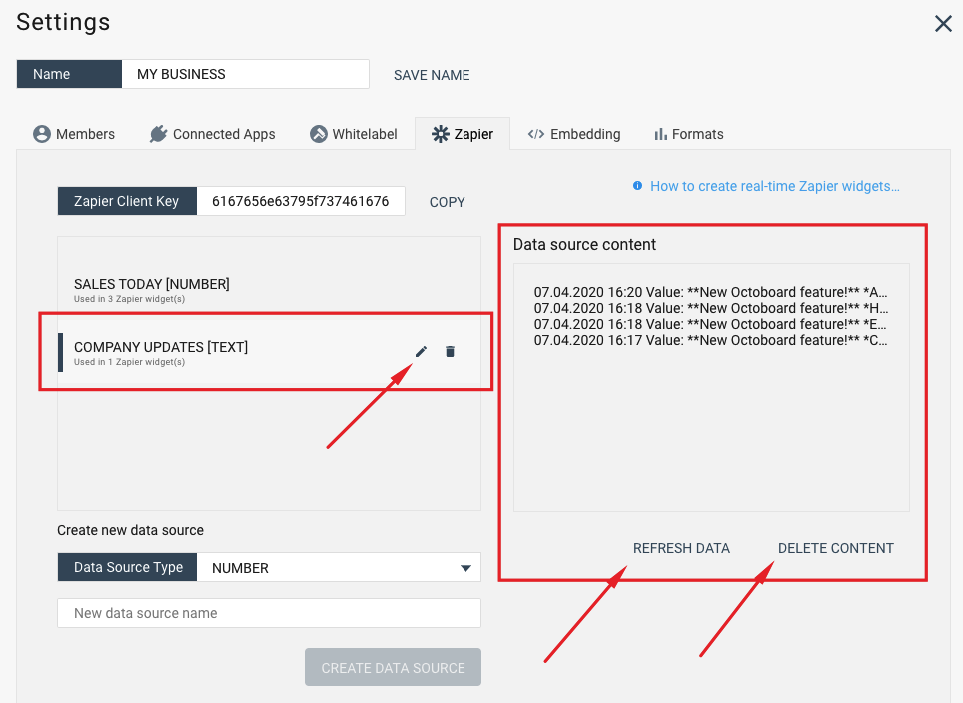
You can now send a few texts from Zapier directly as a test or turn ON the new Zap and send test messages from a Slack channel. Zapier will receive events from Slack and will forward them to Octoboard COMPANY UPDATES text data source. Octoboard will receive live events from Zapier and will store them in COMPANY UPDATES. You can inspect contents of the COMPANY UPDATES data source in the Zapier configuration panel in Octoboard shown below:
You already have COMPANY UPDATES text data source in Octoboard. Slack is now sending messages to COMPANY UPDATES via Zapier. The last step is to create Zapier Text widgets in Octoboard dashboards and reports.
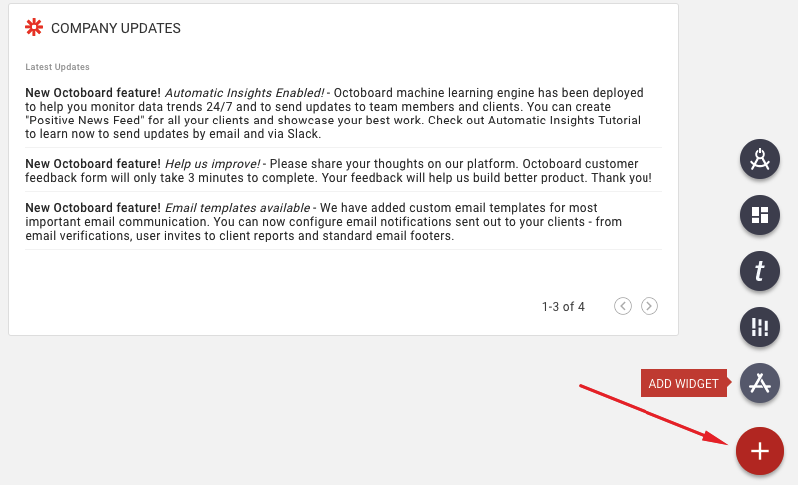
Use red button at the bottom-right of your dashboard (or report section) and select ADD WIDGET action as shown below:
You will invoke Octoboard Wizard that will prompt you to select Application and Widget. In the wizard, select "Zapier", "Zapier Text Widget" and "COMPANY UPDATES" data source:
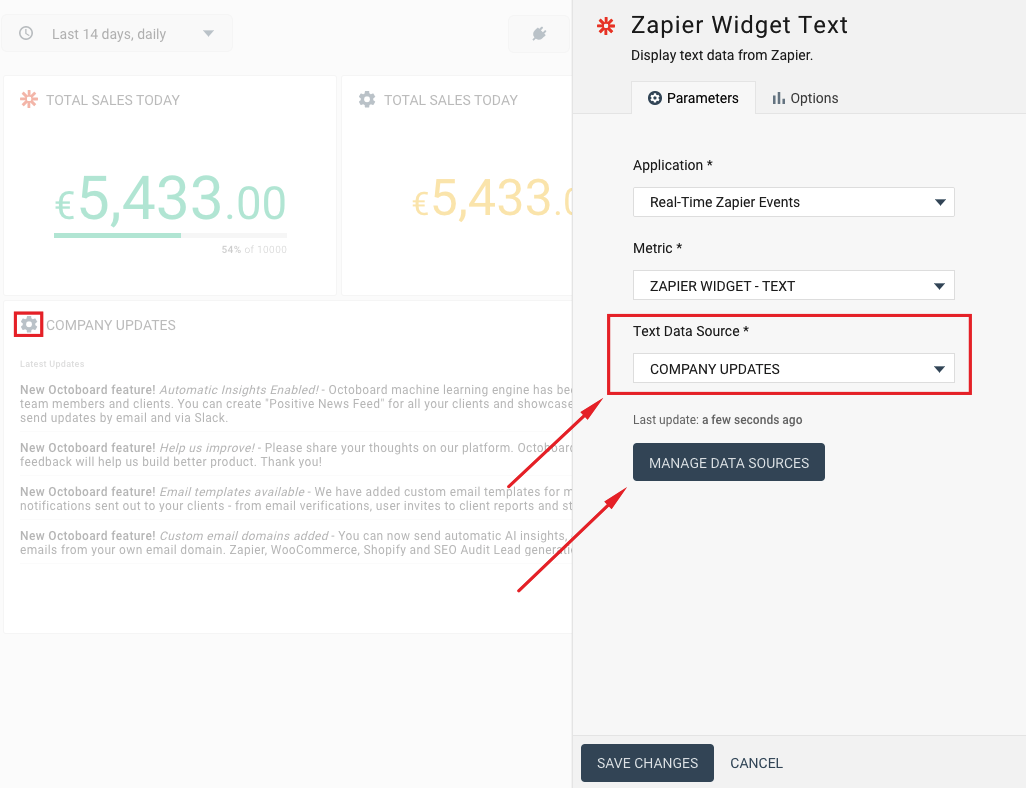
After this step, you will have a text widget added to your dashboard or report section. You can always use CLONE WIDGET option to create multiple copies of the widget – all pointing to the same Zapier data source. It is possible to change widgets’ data sources any time in the future. To achieve that, select widget’s PARAMETERS menu item and use Data Source drop down. Use "MANAGE DATA SOURCE" button to access Zapier data sources configuration panel.
You can follow the same process to create a numeric Zapier data source in Octoboard and send sales data from Stripe, Shopify or any other SaaS subscription and eCommerce application. Use "Update Number" Octoboard action to update sales figures with every client purchase.