Configuring Dashboard Areas
Octoboard platform comes with over 300 fully customizable data templates for building reports, online dashboards and in client portals. Templates make it easy for our clients to organize data and display relevant information from over 70 cloud applications that we integrate with.
We created template variations for reports and separately for dashboards. This is because information displayed in an Office TV dashboard, for example, has to be formatted differently to when it is shown in a report on a printed A4 page.
When you open Octoboard for the first time, you are presented with a selection of dashboard templates. We organize online dashboard templates into Template Areas such as WEB ANALYTICS, SOCIAL, EMAIL MARKETING and others. This image shows your default areas:
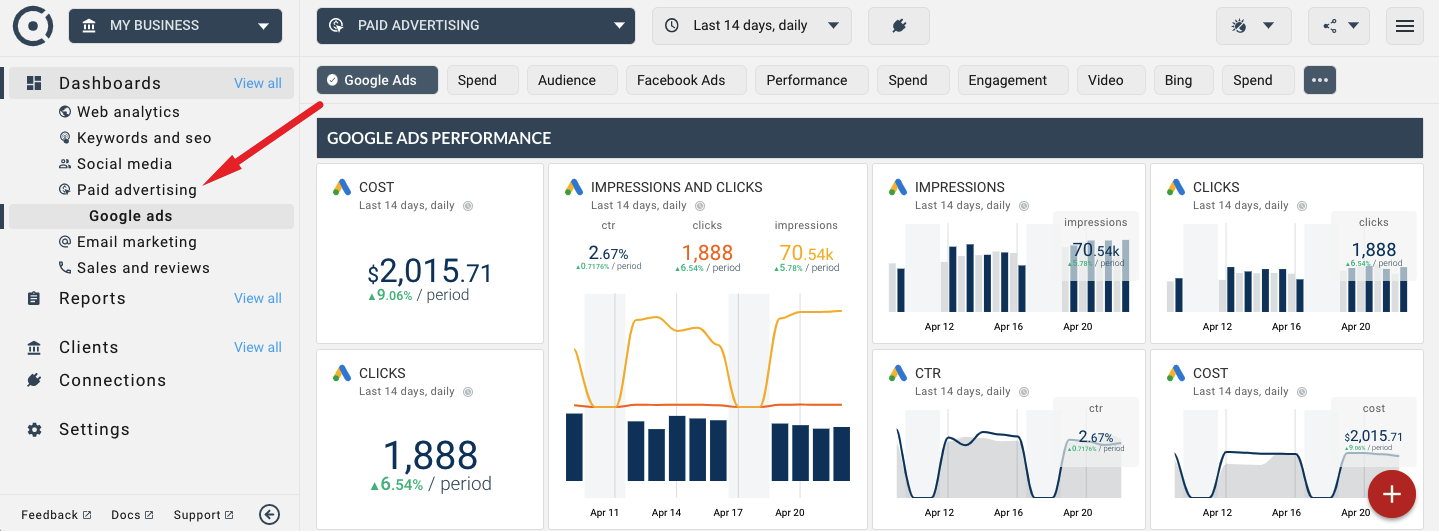
When you click on any of the areas you will see a selection of dashboards to choose from. You and your clients can connect cloud applications immediately and start display data. Here is an example of dashboard templates that have been selected for display under WEB ANALYTICS area:
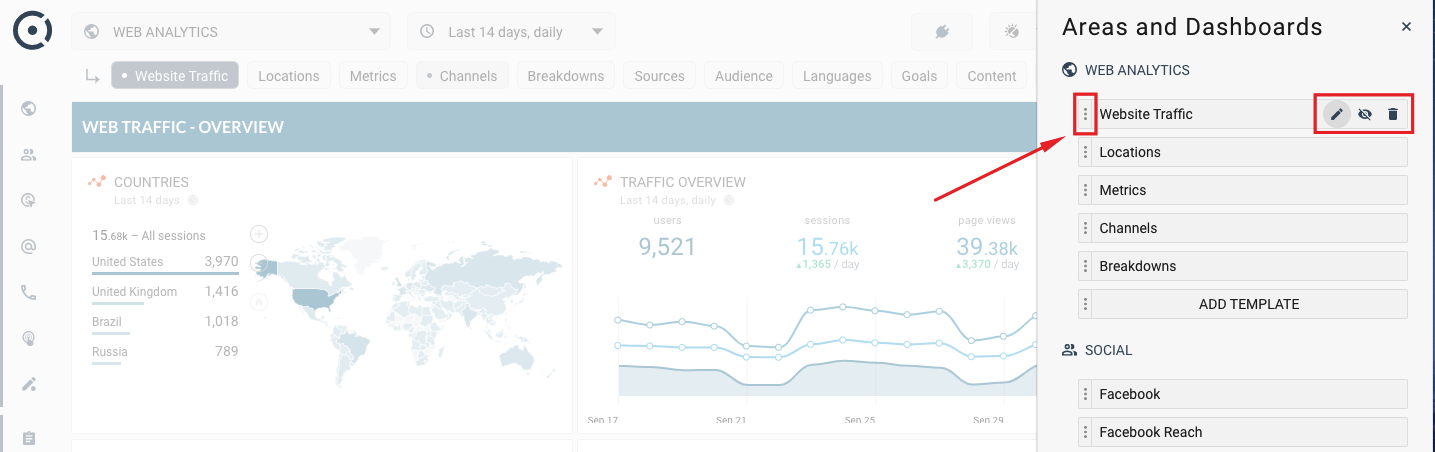
Note "Website Traffic", "Locations", "Channels" and other dashboards pre-created and grouped under WEB ANALYTICS area.
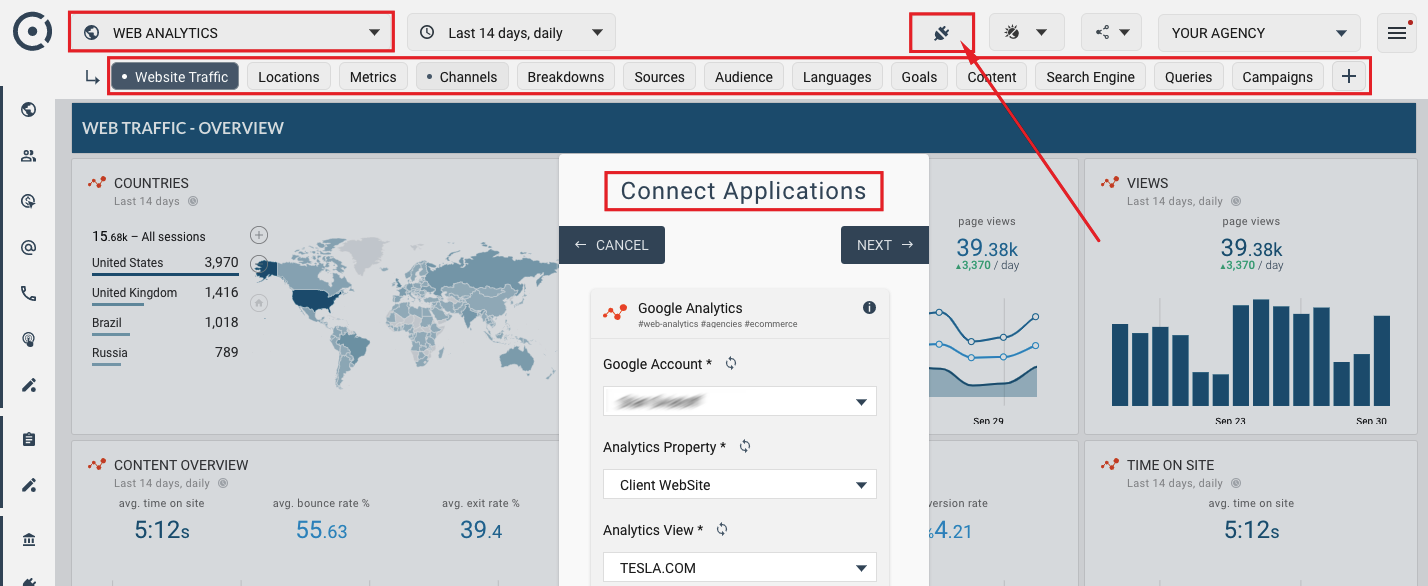
To connect a dashboard to your data, use CONNECT BUTTON at the top of the screen and add your application login (see icon at the top of the screen on the image above). It will invoke Connection Applications panel.
Template Areas is a very powerful feature as it organizes data nicely for you. By default, template areas contain data from over 60 cloud applications. An individual client never uses all of them. You can help your clients organize data by limiting the number of templates based on applications that they use.
This tutorial explains how to configure, rename areas and add, delete and modify templates.
To access Template Area configuration, use the plus button at the top right.
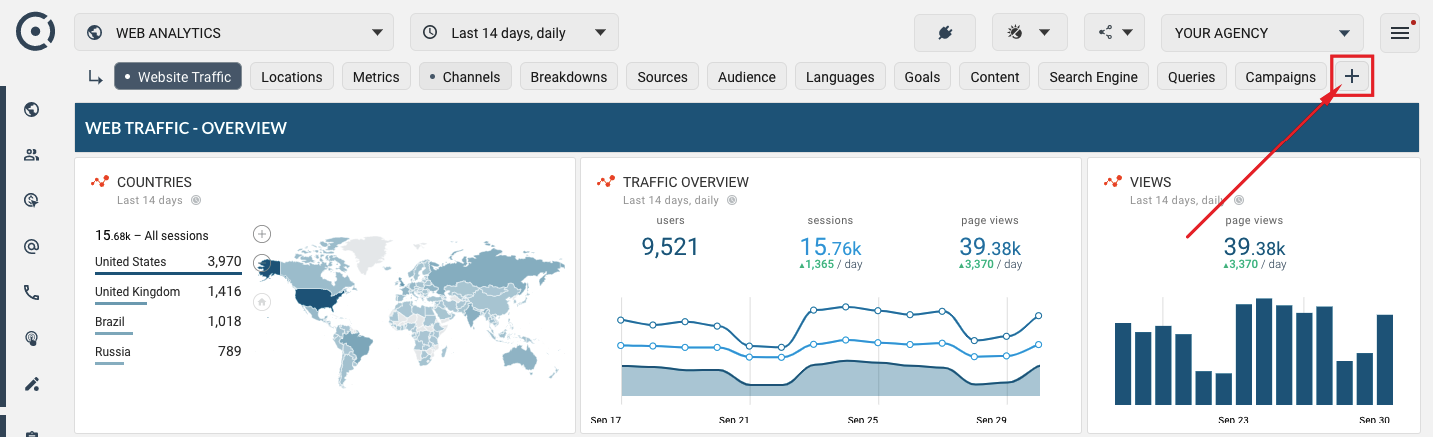
By clicking this button, you will open Area Configuration panel where templates can be modified and configured.
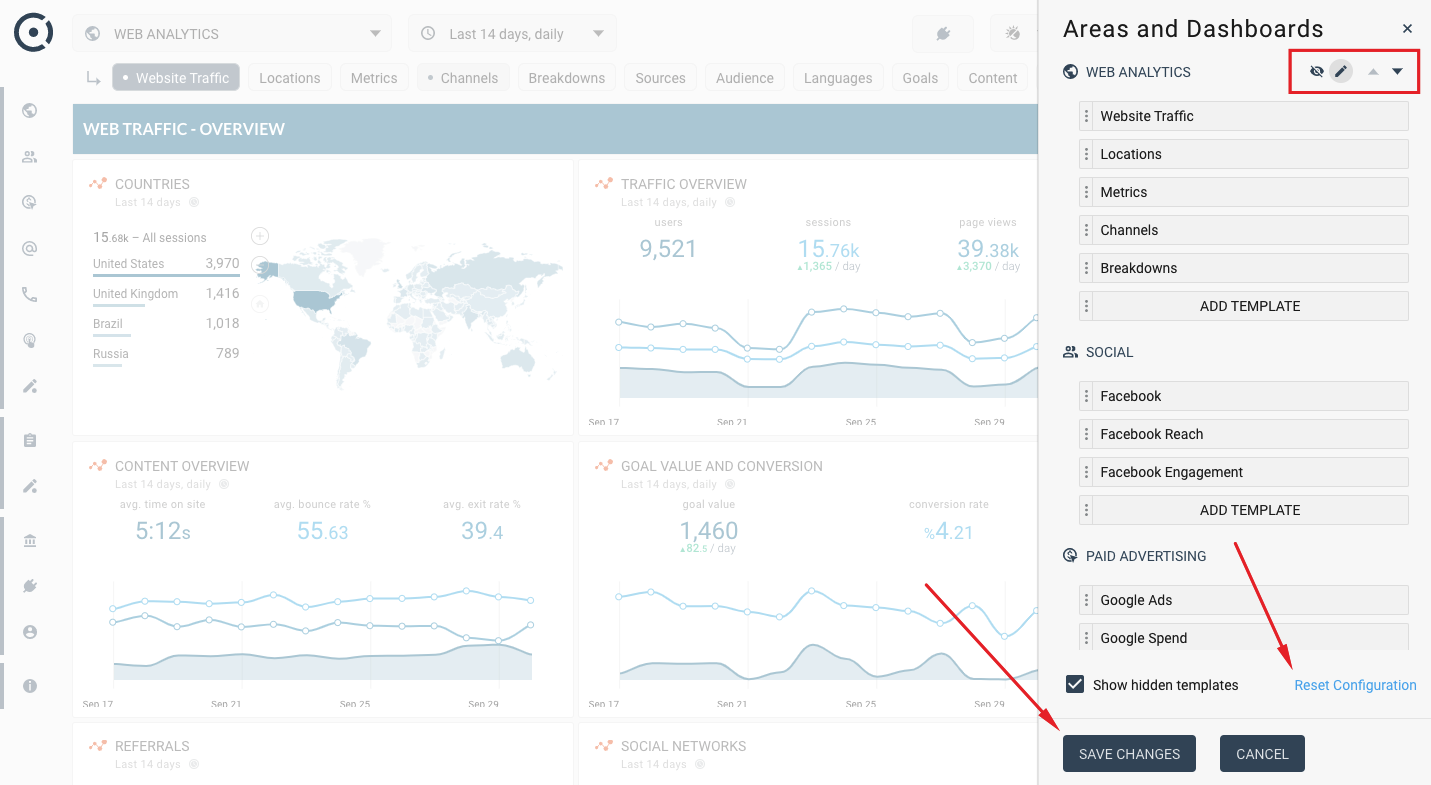
Note buttons next to WEB ANALYTICS area name. By clicking them you can do the following:
- Rename area
- Move area sequence
- Hide or delete areas (you cannot delete last area in the list)
To apply changes use SAVE CHANGES button. And to restore default area configuration, click "Reset Configuration" button.
If your client is not using any Email Marketing applications, simply hide or remove EMAIL MARKETING area from the list. You can put SOCIAL area above WEB ANALYTICS by clicking "DOWN" button next to WEB ANALYTICS.
Changing dashboard template grouping under an area is very easy. Click any button show on the following image or drag-and-drop template titles to change the sequence of templates.
The following operations are possible:
- Rename template
- Hide or delete template
- Change template sequence by dragging titles with the mouse
As before, you can restore defaults by using "Reset Configuration" or cancel any changes by clicking CANCEL button below. Note, that you can hide templates and remove them from display in the Areas and Dashboards panel by deselecting "Show hidden templates" checkbox.
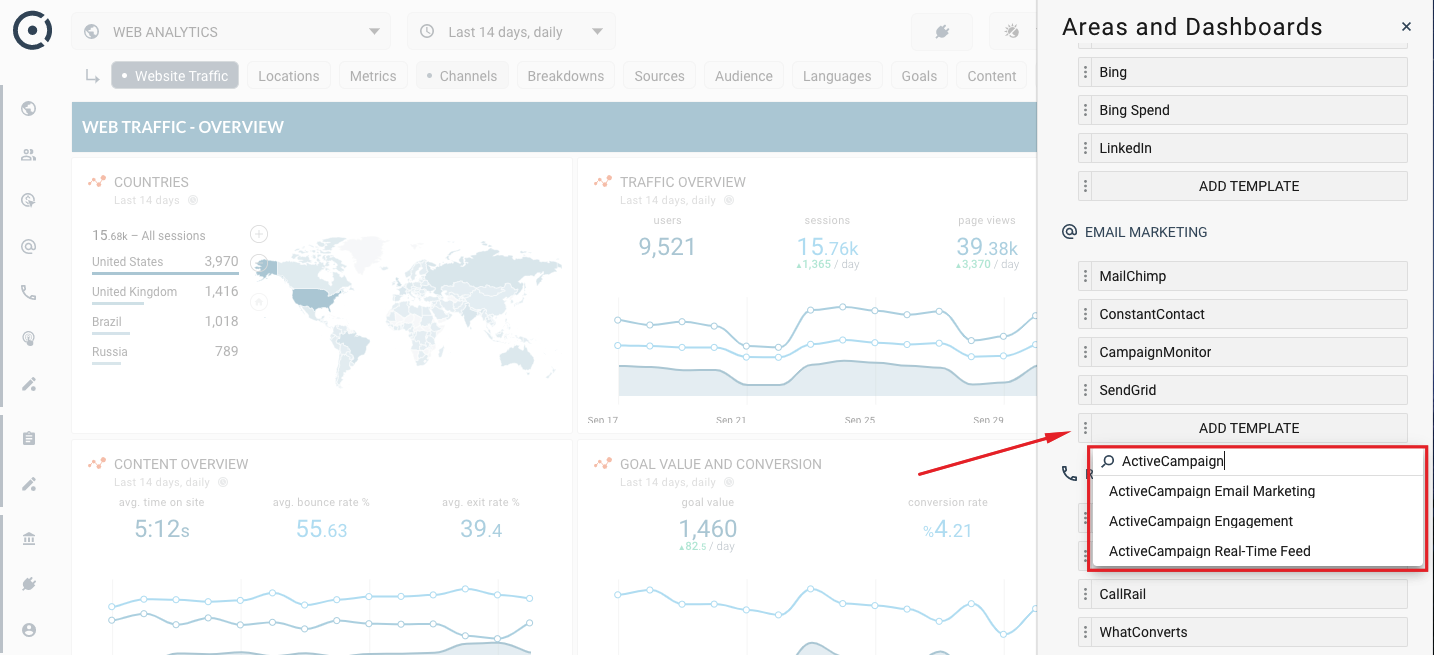
If you deleted a template by mistake, you can always add it back. You can also add multiple templates (same templates, if needed) and give them different names. To do that, use ADD TEMPLATE BUTTON under selected area.
On this image, you are adding an ActiveCampaign Email Marketing template to EMAIL MARKETING AREA.
The tutorial is now complete. You now know how to hide, delete and modify areas and templates, how to add new templates and restore default configurations.
To read more on how areas and dashboards can be used to set up multiple Google My Business locations check out this tutorial.